[RIGDOCKS: Installation Guide] Trying out the trial version
- AZ Sarina Takeda
- Aug 29, 2024
- 4 min read
Updated: Jul 9, 2025
I want to write a script using RIGDOCKS, but I don't know what it can do.
For such users, we have a trial version available!
This time, I will install RIGDOCKS and write a script using the trial version.
It's a blog!
★Table of Contents★
Setting up Reaper
1. Install Reaper and perform initial settings
Download RIGDOCKS -Trial Version-
Try using Script
[After purchase] Grant permissions to other users with MultiUserLicese
Setting up Reaper
Check out this blog to complete the initial setup of REAPER.
Download RIGDOCKS -Trial Version-
Now let's download the trial version of RIGDOCKS.
1. Membership Registration
To download the trial version, you must first register as a member.

There is a login button at the top right of the homepage, below the menu button.

New registration is
・Google account
・Facebook account
·email address
is possible.
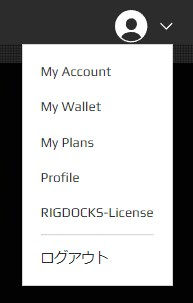
If your account menu looks like this
Your membership registration is complete!

2: RIGDOCKS Bridge [User authentication app]
Next, download RIGDOCKS Bridge (hereafter referred to as Bridge) for user authentication.
Look for the green icon at the top of the download page

Go to the download page
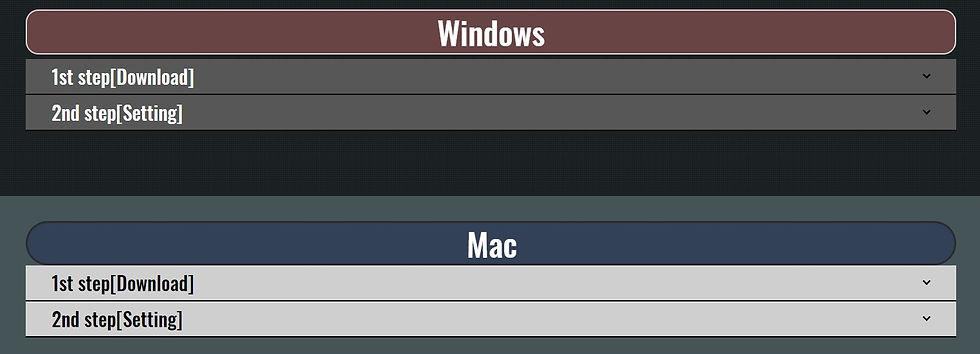
You can choose between Windows or Mac.
Please select the OS that suits your environment.

The download and setup instructions are at the bottom of the page.
After downloading, please check here

Once you can log in to the Bridge app, you're ready to go!

3. Start the trial version
Select "RIGDOCKS-License" in the account menu.
Go to the RIGDOCKS LICENSE MANAGEMENT page.

As you scroll down the page, you'll see the status of each plan.
Select [Trial Version] in the License tab.

Click OK and the trial version will start.
[Note!] The trial version is only available for 30 days .

If the loading screen appears and the License Type is displayed as [Trial Version] as shown below,
You're ready to go!

4. Download the plan
Next, choose whether you want to download the plan you just chose.
From the menu button, click RIGDOCKS > Download.

You will be redirected to the download page for each rank.
You can download your favorite ranks from here.

This time I've started the trial version of BRONZE, so I'll download BRONZE.
Go to the download page and click the download button that matches your OS.
The installation method is described below.

Your BRONZE download is now complete!
Now let's try it out with REAPER.

Try using Script
REAPDOCK offers a variety of scripts!
Let's download it and use it.
1-1.REAPDOCK page description
First, go to the REAPDOCK page and select either the Lua or Python language page.
*If you don't know which one is better, I recommend Python (there are many books available on the subject).
①General genre
②Detail button: Jump to the Script details page
③ Plan to be used: Shows which plan the API you are using is included in.
In this image, the BRONZE plan is used.
④Script title: The name is chosen so that the content can be roughly understood.
After downloading, you can rename it yourself.
⑤Script content: What can it do?

1-2.Download the script from the REAP DOCK page
This time from the Python page
[AZSTOKE_AllMediaNameAscendingOrderSetter/Sort all media in ascending order]
I will try using it.
Select the Detail button. You will be taken to the Script details page.

There is also a "Script Download" button in the middle of the page which allows you to download and use the script as is.

Download and unzip the zip folder.
You can see the python file.

You're all set!
2. Using Script in Reaper
Launch Reaper and load the script.
① Actions > Open Action List
② New Action > Load ReaScript
Load the Python file you downloaded earlier.

You can run it by pressing the "Run" button,
You can open and check the script by pressing the "Edit Action" button.
If you want to run it in this state, you can press "ctrl + S" or "Cmd + S".

When you run it, the waveforms are sorted in ascending order !
If the Script screen says "Save and recompiled!" , it means the script was executed without any problems.

[After purchase] Grant permissions to other users with MultiUserLicese
Finally, we will explain the [MultiUserLicense] so that you can use it as a team.
1. Grant permissions to another user
Select "RIGDOCKS-License" in the account menu.
Go to the RIGDOCKS LICENSE MANAGEMENT page.

Select the plan you want to share and select the "Add User" button under [SharingUser].

Enter the email address of the user you want to add.
*Only available to users who have completed their membership registration .

If the number of users has increased under Sharing User, the process is complete.

Deleting a user is easy.
Click the "Delete" button next to the email address of the user you want to delete.
If the deleted user has been moved to Shared User, the operation was successful.

2. MultiUser License for team use of RIGDOCKS
We can also accommodate title assignments and changes in the number of people after mastering.
Please make use of this tool with your entire development team!


Comments