
[Road of SKYSQUARE-031-] Studio Setup!! ~The Room~
- Aug 25, 2025
- 4 min read
![[Road of SKYSQUARE-031-] Studio Setup!! ~The Room~](https://static.wixstatic.com/media/fc32ca_332c03640b444eebac920bda9e05ed16~mv2.jpg/v1/fill/w_980,h_551,al_c,q_85,usm_0.66_1.00_0.01,enc_avif,quality_auto/fc32ca_332c03640b444eebac920bda9e05ed16~mv2.jpg)
Hello
This is Nakajima from AZSTOKE Co., Ltd.
This is the purpose of this project.
Finally, the studio building is set up!!
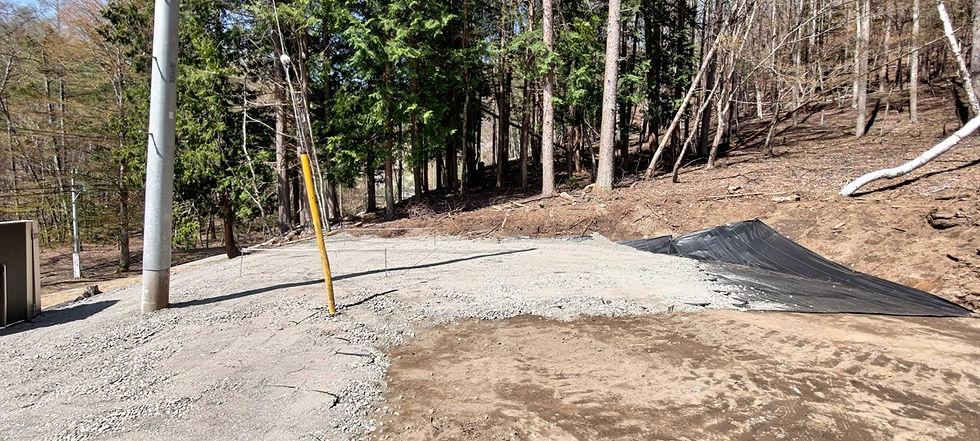
In the previous blog, " [Road of SKYSQUARE-030-] Soil Improvement!! ~Ground~ ", the ground was firmly compacted and finally ready for the building to be erected.
The studio building will be set up on the prepared land.
Click here for a list of previous SKYSQUARE Road articles

■Table of Contents
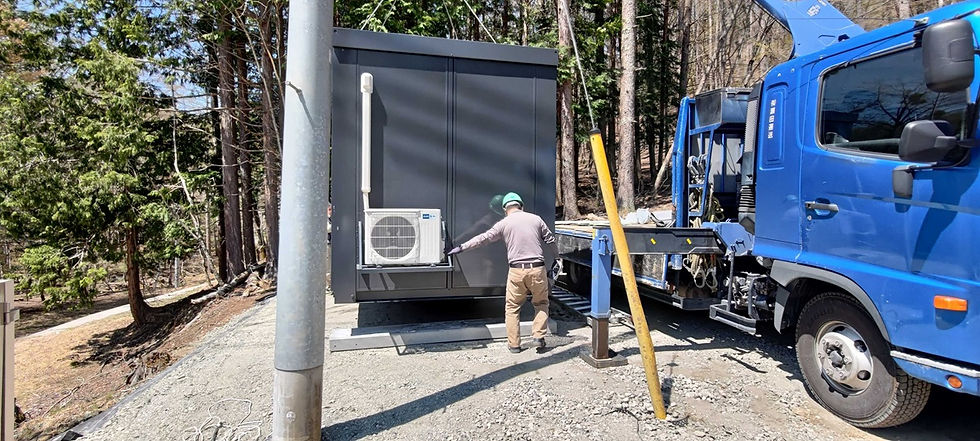
1. Transporting prefabricated buildings by truck
Finally, the prefabricated building was loaded onto a truck and pulled up to the entrance.
Everything is assembled up to this point, so all that's left to do is place it on site.


2. Move the car next to the planned installation location
This was something we had anticipated beforehand, and crushed stone had been placed next to the planned installation site to solidify the ground, making it possible for the truck to back in.
The crane is operated by a truck equipped with a crane, known as a Unic vehicle.


3. First, lay the concrete foundation
If you fix it to the ground, you will have to pay property tax.
This time, we will be using a method that involves placing concrete weights on the ground, which can be installed without being fixed to the ground, and connecting them to the concrete, allowing the building to be installed.


4. Once the concrete is laid, add the prefabricated building!!
After the concrete is installed, the prefabricated structure will be hung and carried to the designated location.
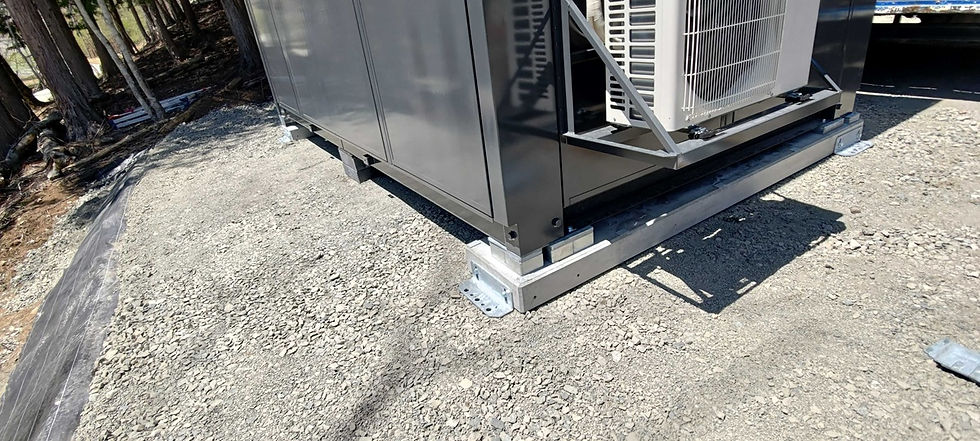
If you just install it like this, it won't be level,
Now hang it up and check the level.

5. Add the iron plate and make fine adjustments
The angle is adjusted using a spirit level, and then fine-tuned using various numbers of iron plates.
The installation was a testament to the experience of a master craftsman, as various sizes were added and adjusted while checking the work many times.


6. The level has been achieved!!
After introducing various steel plates and making repeated fine adjustments, we finally managed to get the level and complete the installation. Looking at the end result, it turns out to be quite a complicated structure.

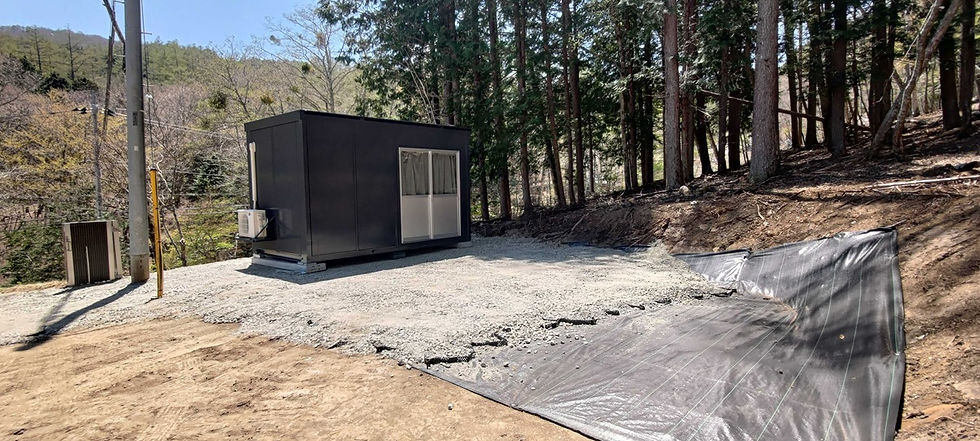
7. Finally, the installation is complete!!!
The installation of the control room has finally been completed. I am deeply moved that we have been able to develop this area, which was originally overgrown with trees.

8. Introducing the interior
Although it is a small space of 6 tatami mats,
I'm so happy that I finally got an interior space after having none before.
There's a sense of security that's different from being in a car. This time I bought a prefabricated house with air conditioning, so as long as the electricity is on, I'm sure it will be a very comfortable space.
In the future, we will be doing overnight recordings, and we will be working on the infrastructure construction to get electricity here, so we will be working on the procedures for that.


9. Summary
It's been a long journey so far, but we've taken another step forward.
There is still a long way to go, but I plan to keep moving forward.
We gained a lot of experience during the process of installing this prefabricated building.
This experience is especially valuable for my future development in the field of civil engineering.
You can see that this is an ability that can be put to good use.
We will continue to carry these values forward, evolving the facility into one that can handle a variety of recordings, and ultimately leading to the realization of recording using heavy machinery.
We will continue to forge ahead on the path of SKYSQUARE.
![[Road of SKYSQUARE-030-] Soil Improvement!! ~Ground~](https://static.wixstatic.com/media/fc32ca_4f02efec1ba343db853b72783e10eb61~mv2.jpg/v1/fill/w_980,h_551,al_c,q_85,usm_0.66_1.00_0.01,enc_avif,quality_auto/fc32ca_4f02efec1ba343db853b72783e10eb61~mv2.jpg)
![[Road of SKYSQUARE-029-] Emergency!! ~Mud Land~](https://static.wixstatic.com/media/fc32ca_adeb9fb81988482ea630d1bdf7c38911~mv2.jpg/v1/fill/w_980,h_551,al_c,q_85,usm_0.66_1.00_0.01,enc_avif,quality_auto/fc32ca_adeb9fb81988482ea630d1bdf7c38911~mv2.jpg)