
[Reaper x UE5] I created an app to control Reaper using RIGDOCKS' new RADNODZ feature! [Connection Test Edition]
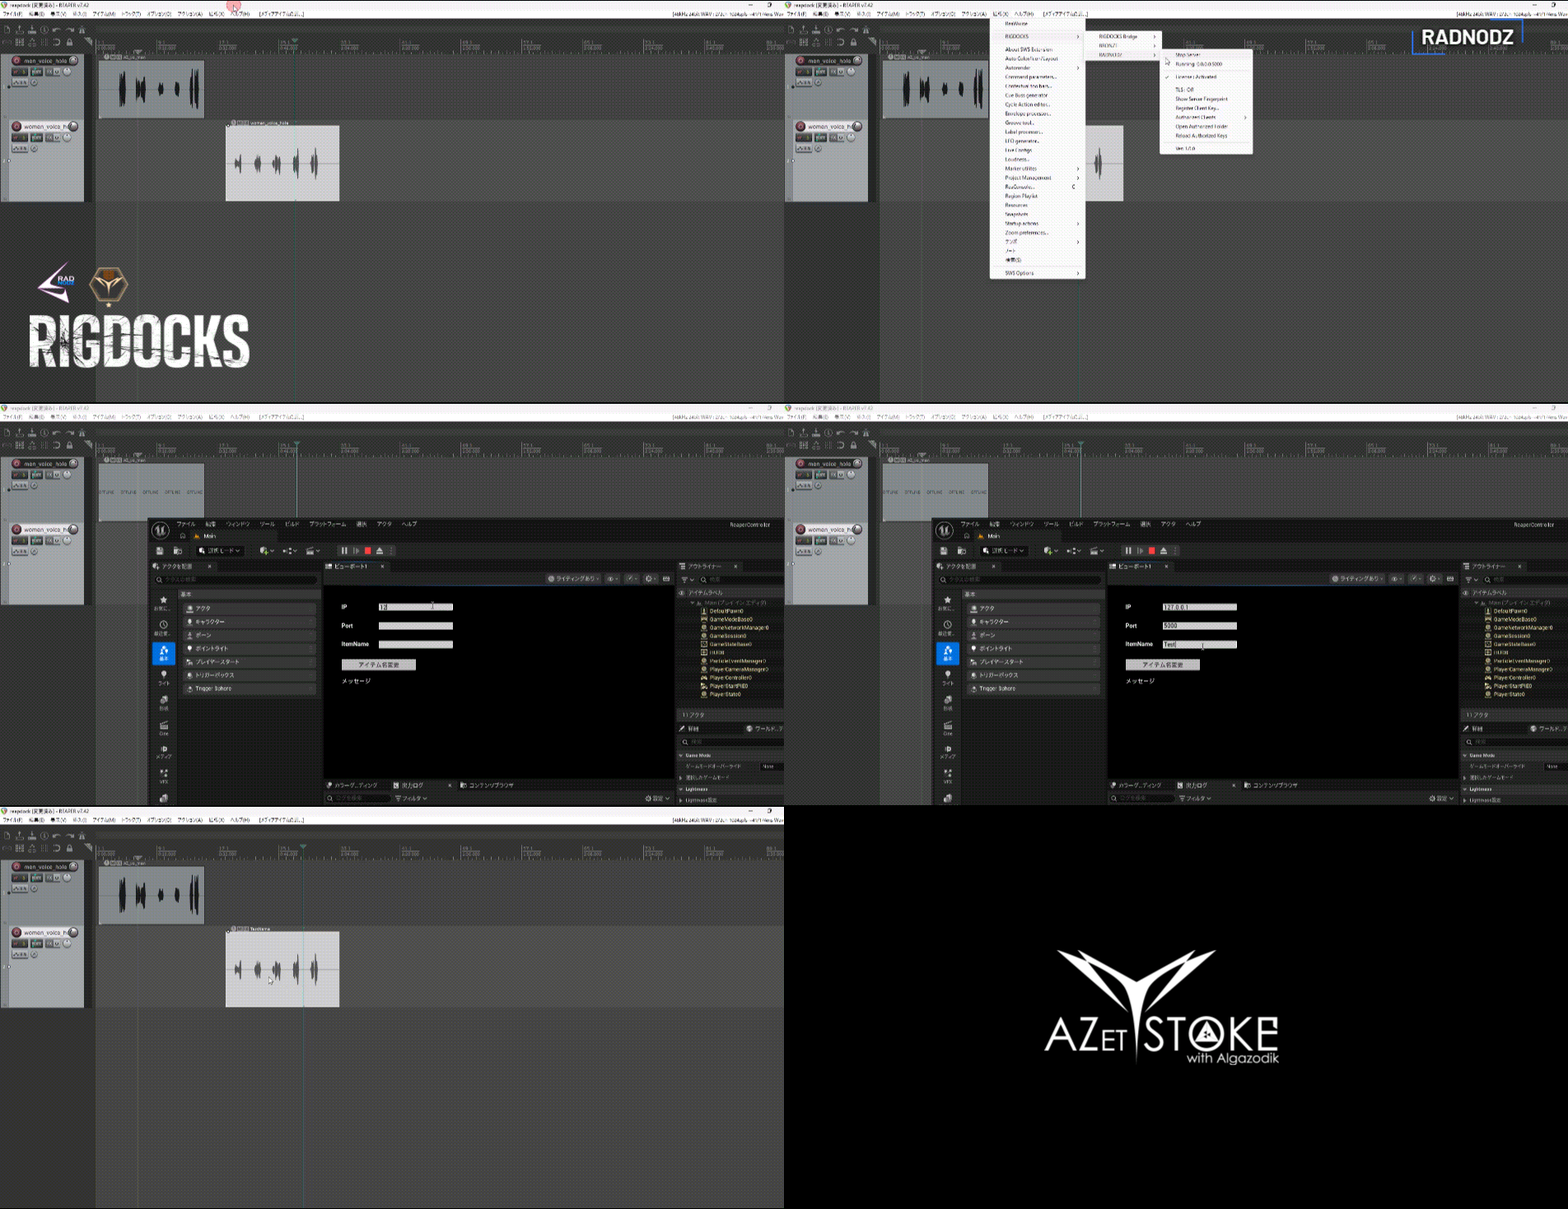
table of contents
What is RADNODZ?
RADNODZ, a new feature in RIGDOCKS, is a mechanism for remotely executing the RIGDOCKS API from another application.
With RIGDOCKS, you can do things like the following:
RZDNODZ allows you to create applications that perform these operations using Unreal Engine 5's powerful UI building capabilities.
Preparation
This time, we created a project called "ReaperController" and installed RADNODZ.


Create an empty level and save it in the "Level" folder with the name "Main".
*The level name and save location name are optional.


Unreal Engine 5 screen implementation (Blueprint)
First, we create a screen that will serve as the framework for running RADNODZ's functions. In Unreal Engine, UI elements are called Widgets, and we create them using a feature called UMG (Unreal Motion Graphics).
① Create a Widget Blueprint
Right-click in an empty area of the Content Browser (at the bottom of the screen).
From the menu, select User Interface > Widget Blueprint.

When prompted to "Select parent class," click User widget.

You will be prompted to enter a name, so type WBP_RadnodzDemo and press Enter.
*The blueprint name is optional.

② Understand the UMG Designer screen.
Double-click WBP_RadnodzDemo to open it.
This screen is the designer screen, where you can arrange the elements of the screen.

Each element of the designer screen
① Palette... A list of parts that can be placed. Drag and drop from here to use them.
② Hierarchy... The parent-child relationships of the placed parts. You can also change the names here.
③ Canvas... Actual appearance
④ Details... Settings for the selected part
③ Arrange the parts
Type "CanvasPanel" into the search bar at the top of the palette, and then drag and drop the resulting CanvasPanel to the center of the canvas. This will serve as the base.

Drag the next element from the palette onto the CanvasPanel in the hierarchy panel .
Name to search for in palette | role |
Editable Text Box | Input field for destination IP address |
Editable Text Box | Port input field |
Editable Text Box | New name input field |
Button | Execute button |
Text Block | Display of results, labels |

A Button is simply a "pressable rectangle" and does not contain any text. Therefore, you can display text on a button by placing a TextBlock as a child element.

Give the added element a name. Doing so will allow you to reference the element from Blueprint or C++ and retrieve or modify its values.
You can rename a part by double-clicking it in the hierarchy panel. Please rename it as follows:
parts | Name to give |
First Editable Text Box | IpTextBox |
Second Editable Text Box | PortTextBox |
Third Editable Text Box | NameTextBox |
Button | RenameButton |
Text Block | StatusText |

Furthermore, with each item selected, check the "Is Variable" checkbox at the very top of the details panel.

④ Display the screen at the start of the game.
The widget you create won't appear on the screen just by placing it down. You need to give it a command to "display when the game starts."
This is written in the level blueprint.
Close the UMG editor and return to the main editor.
Click Blueprint → Open Level Blueprint in the toolbar.
Open Level Blueprint

A black grid screen (graph) will open. There should already be a node called Event BeginPlay. If not, right-click in an empty area, search for Event BeginPlay, and add it.
Event BeginPlay means "this event is executed only once, at the moment the game starts."

Connect the following four nodes.
Event Begin Play
→ Create Widget (Specify WBP_RadnodzDemo as the Class)
→ Add to Viewport (Connect the Return Value of Create Widget to Target)
→ Set Input Mode UI Only (Connects Get Player Controller to Player Controller)
→ Set Show Mouse Cursor (Check Get Player Controller / Show Mouse Cursor in Target)

The commands "Set Input Mode UI Only" and "Set Show Mouse Cursor" instruct the system to switch to a mode where you interact with the UI instead of the game screen, and to display the mouse cursor. Without these commands, you cannot click buttons.
Click "Compile" → "Save" in the upper left corner.

⑤ Operation check
Click ▶ Play on the toolbar. If three input fields and a button appear and you can click them with your mouse, then it's successful (nothing will happen if you click them yet).


You can exit by pressing the stop button or the Esc key.
Troubleshooting steps if it doesn't display correctly
Symptoms | Confirm |
Nothing is displayed. | Is WBP_RadnodzDemo specified as the Class for Create Widget? |
It appears but cannot be clicked. | Did you connect Set Input Mode UI Only and Set Show Mouse Cursor? |
Changes are not reflected. | Did you press compile? |
Trying to connect to Reaper using Blueprint in Unreal Engine 5.
To implement functionality into the placed parts, switch from the designer screen to the graph screen.

① Try searching for RADNODZ nodes.
Nodes are organized in a hierarchy of RADNODZ | Rank | Genre | Operation. For example, setting the media item name is located under RADNODZ > BRONZE > MediaItem > Name.

When you know the function name, the quickest way to find it is to search directly using the function name, such as AZ_SetMediaItemName.

*If it doesn't show up in the search: In the upper right corner of the search bar...
Try unchecking the "Dependent on a Context" option. This can sometimes interfere because UE filters and displays only the nodes that fit the current location you are trying to connect to.

② Create a variable to hold the client.
We'll keep an object responsible for connecting to REAPER as a variable.
In the My Blueprints panel on the left side of the screen, click the + button to the right of Variables.
Name it "Client".

Click on Variable Type in the Details panel and enter Radnodz Client in the search bar.
Select the Radnodz Client object reference that appears.

*Why use a variable? Because reusing a connection after it's been established is faster and more reliable than reconnecting it every time you press the button. By storing it in a variable, you can use the same connection the next time you press the button.
③ Create a button click event.
Return to the Designer tab and select RenameButton.
Scroll all the way down the details panel and you will find an item called Events. Click the + button to the right of OnClicked.

The screen will automatically switch to the graph view, and a node called "On Clicked (RenameButton)" will be added. This is the entry point for the "when the button is pressed" event.

④ Connect
① Prepare the client
The branching point is whether to create it if it hasn't been made yet.
Drag the Client variable from MyBlueprint onto the graph → select Get Client.

Drag and release the blue pin from Get Client → Search for Is Valid and add it. Is Valid is a node that checks whether an object is valid.

Right-click → Add a Branch and connect the result of Is Valid to Condition. A Branch is a node that branches the processing depending on whether the value passed to Confidence is True or False.
From Branch's False setting, add Create Radnodz Client.
Connect that return value to the Set Client variable, which you created by dragging the Client variable while holding down the Ctrl key.

*Regarding dragging variables: Dragging a variable normally from My Blueprint will perform a Get (read) operation, while dragging while holding down Ctrl will perform a Set (write) operation.
② Connect
If Branch is True, or if it's False, set it to Client and then add a Connect node.
Drag the IpTextBox from MyBlueprint onto the graph (select Get), then drag from its pin → Add Get Text
Connecting the return value of Get Text to the ip pin of Connect will automatically insert a conversion node (Text → String).
The same applies to ports. For ports, you insert a To Int after a To String.

③ If it fails, display an error message.
The result of Connect is connected to Branch, and if Branch is False, the process branches to change the text in Status Text. If Connect fails, the process ends here, so nothing is connected to SetText.

⑤ Obtain a media item and rename it.
The main point starts with Branch being True. We will use AZ_SetSelectedMediaName to change the name of the selected item.
Once the process is complete, disconnect using Disconnect.

*The client pin is required. RADNODZ API nodes will throw a compilation error if the client pin is not connected. If you're having trouble compiling, check this pin first.
⑥ Try running it
Click Compile → Save.

Verify that the server is running on the REAPER side.

Play in UE ▶

Verify the IP address, port, and new name, then press the button.

If the media item name in REAPER changes immediately, it's a success.

Unreal Engine 5 screen implementation (C++)
Let's try creating the same thing in C++. In practice, a common approach is to put the processing in C++ and only adjust the appearance using Blueprint. This is because C++ makes the code easier to read and understand when the number of nodes increases and becomes entangled.
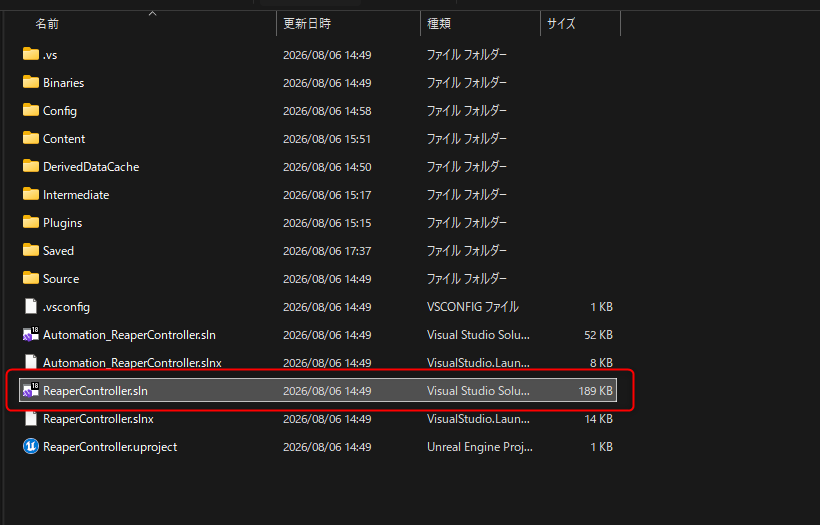
To write C++ code, open the Visual Studio solution file.
① Add dependent modules to Build.cs
In Unreal Engine (UE), you specify which modules (blocks of functionality) to use in a file called Build.cs. If you don't specify them here, you can't call the plugin's functionality from C++.
Open Source/ReaperController/ReaperController.Build.cs in Visual Studio and do the following:
using UnrealBuildTool;

public class ReaperController : ModuleRules
{
    public ReaperController(ReadOnlyTargetRules Target) : base(Target)
    {
        PCHUsage = PCHUsageMode.UseExplicitOrSharedPCHs;

        PublicDependencyModuleNames.AddRange(new string[]
        {
            "Core", "CoreUObject", "Engine", "InputCore",
            "UMG", "Slate", "SlateCore",          // UMG を C++ から触るのに必要

            "RadnodzClientPlugin",                // 接続クライアント(必須)
            "RigdocksBronzePlugin",               // BRONZE の API
            // "RigdocksSilverPlugin",            // 必要になったら追加
            // "RigdocksGoldPlugin",
        });

        PrivateDependencyModuleNames.AddRange(new string[] { });
    }
}


RadnodzClientPlugin is always required. After that, you just need to add the modules for the ranks you want to use.
After editing Build.cs, please regenerate the Visual Studio project files. Right-click on ReaperController.uproject and select Generate Visual Studio project files.

② Create a class that inherits from UserWidget.
From the UE editor menu, select Tools > New C++ Class.
In the list of parent classes, switch to the All Classes tab and enter UserWidget in the search bar.
Select UserWidget and click Next.

Create a class and name it RadnodzDemoWidget.

Visual Studio will create RadnodzDemoWidget.h and RadnodzDemoWidget.cpp.

③ Write the header
Rewrite RadnodzDemoWidget.h as follows:
#pragma once

#include "CoreMinimal.h"
#include "Blueprint/UserWidget.h"
#include "RadnodzDemoWidget.generated.h"

class UButton;
class UEditableTextBox;
class UTextBlock;
class URadnodzClient;

UCLASS()
class REAPERCONTROLLER_API URadnodzDemoWidget : public UUserWidget
{
    GENERATED_BODY()

protected:
    virtual void NativeConstruct() override;
    virtual void NativeDestruct() override;

    // ---- UMG のパーツと結びつける ----
    // ここの変数名は、Widget Blueprint 側のパーツ名と完全に一致させること
    UPROPERTY(meta = (BindWidget))
    TObjectPtr<UEditableTextBox> IpTextBox;

    UPROPERTY(meta = (BindWidget))
    TObjectPtr<UEditableTextBox> PortTextBox;

    UPROPERTY(meta = (BindWidget))
    TObjectPtr<UEditableTextBox> NameTextBox;

    UPROPERTY(meta = (BindWidget))
    TObjectPtr<UButton> RenameButton;

    UPROPERTY(meta = (BindWidget))
    TObjectPtr<UTextBlock> StatusText;

private:
    UFUNCTION()
    void OnRenameClicked();

    void SetStatus(const FString& Message);

    UPROPERTY()
    TObjectPtr<URadnodzClient> Client;
};
The key point here is `meta = (BindWidget)`. This specifies that any part with the same name in the Widget Blueprint should be automatically assigned to this variable. If it doesn't match the name you assigned in step 4 (e.g., `IpTextBox`), an error will occur in the Widget Blueprint.
*The `REAPERCONTROLLER_API` part is the project name in uppercase. If you have changed your project name, please use what is written in the automatically generated header. ④ Implementation (screen part only)
Modify RadnodzDemoWidget.cpp as follows (connection processing will be added in the next chapter ):
#include "RadnodzDemoWidget.h"

#include "Components/Button.h"
#include "Components/EditableTextBox.h"
#include "Components/TextBlock.h"

void URadnodzDemoWidget::NativeConstruct()
{
    Super::NativeConstruct();

    // ボタンが押されたら OnRenameClicked を呼ぶよう登録する
    if (RenameButton)
    {
        RenameButton->OnClicked.AddDynamic(this, &URadnodzDemoWidget::OnRenameClicked);
    }
}

void URadnodzDemoWidget::NativeDestruct()
{
    Super::NativeDestruct();
}

void URadnodzDemoWidget::SetStatus(const FString& Message)
{
    if (StatusText)
    {
        StatusText->SetText(FText::FromString(Message));
    }

    UE_LOG(LogTemp, Log, TEXT("[RADNODZ] %s"), *Message);
}

void URadnodzDemoWidget::OnRenameClicked()
{
    SetStatus(TEXT("クリックされました"));
}
NativeConstruct() is called "when this Widget appears on the screen". It is equivalent to Blueprint's Event Construct.
⑤ Build
Close the UE editor, then build in Visual Studio (Build > Build Solution menu).

Once the build is complete, reopen ReaperController.uproject.
⑥ Replace the parent class of the Widget Blueprint.
We will now link the C++ class we created with the screen we created using Blueprint.
Open WBP_RadnodzDemo.
Remove the node that was connected to the RenameButton's OnClick event.
Select the graph, then click the Tab → Class Settings in the Toolbar.

Change the parent class of the details panel to Radnodz Demo Widget.

Click Compile → Save.
If you get an error message saying "BindWidget variable not found" at this point, it means the names don't match. Compare the part name in the hierarchy panel with the variable name you wrote in the header.
Play the game, and if the StatusText changes to "Clicked" when you press the button, it's a success.


Connecting to Reaper with Unreal Engine 5 (C++)
We will simply replace the code we created in Blueprint in Chapter 5 with C++.
① Add include
Add this to the beginning of RadnodzDemoWidget.cpp.
#include "RadnodzClient.h"                  // URadnodzClient / FRigdocksError
#include "ReaperClasses.h"                  // UReaProject / UMediaItem
#include "RigdocksBronze_MediaItem.h"       // URigdocksBronze_MediaItem
② Connect and rename
Rewrite OnRenameClicked() as follows:
void URadnodzDemoWidget::OnRenameClicked()
{
    // ---- 1. クライアントを用意する(初回だけ生成し、以降は使い回す)----
    if (!Client)
    {
        Client = URadnodzClient::CreateRadnodzClient();
    }

    // ---- 2. 接続する ----
    const FString Ip = IpTextBox->GetText().ToString();
    const FString Port = PortTextBox->GetText().ToString();

    if (!Client->Connect(Ip, FCString::Atoi(*Port)))
    {
        const FRigdocksError Error = Client->GetError();
        SetStatus(FString::Printf(TEXT("接続失敗 (%d): %s"), Error.ErrorCode, *Error.Message));
        return;
    }

    // ---- 3. 名前を設定する ----
    const FString NewName = NameTextBox->GetText().ToString();

    URigdocksBronze_MediaItem::AZ_SetSelectedMediaName(Client, 0, 0, NewName);

    // ---- 4. 成否を確認する ----
    const FRigdocksError Error = Client->GetError();
    if (Error.ErrorCode != 0)
    {
        SetStatus(FString::Printf(TEXT("リネーム失敗 (%d): %s"), Error.ErrorCode, *Error.Message));
        return;
    }

    SetStatus(FString::Printf(TEXT("リネーム成功: %s"), *NewName));
}
③ Clean up
The connection will be disconnected when the widget is closed.
void URadnodzDemoWidget::NativeDestruct()
{
    if (Client && Client->IsConnected())
    {
        Client->Disconnect();
    }

    Super::NativeDestruct();
}
④ Build and verify
Build and verify in Visual Studio.

Let's have AI create it (Claude Code)
I've been creating these manually up to this point, but now I'll have Claude Code (an AI coding agent that runs in the terminal) create the same thing.
① Preparation: Teach the AI the prerequisites.
If you suddenly ask the AI to "create a screen to connect to Reaper," it won't know what RADNODZ is. It's important to have a file outlining the project rules.
In the case of Claude Code, the CLAUDE.md file located in the project root directory is loaded every time. For example, you might write the following in it.
# このプロジェクトについて
UE 5.8 のプロジェクト。RADNODZ プラグイン経由で REAPER を操作する。
## RADNODZ の使い方
- 接続クライアントは `URadnodzClient::CreateRadnodzClient()` で生成し、`Connect(ip, port)` で接続する
- API はすべて `AZ_` 始まりの static 関数。第 1 引数は必ず `client`
- 成否は呼び出し直後に `Client->GetError()` の `ErrorCode` で判定する(戻り値では判定できない)
- BRONZE を使うときは Build.cs に `RigdocksBronzePlugin` を追加する
## ビルド確認
コード変更後は必ず以下を実行し、`Result: Succeeded` を確認する:Build.bat RadnodzDemoEditor Win64 Development -Project="<プロジェクトパス>" -WaitMutex -NoHotReload
② Try making a request
Open a terminal in the project folder and launch claude to submit your request.
UE の Widget から REAPER に接続して、選択中の中から1つ目のメディアアイテムの名前を変更する画面を新しく作ってください。
- 画面名は RadnodzDemoFromAI
- 画面名のフォルダを作成して必要なファイルをその中に格納
- IP / ポート / 新しい名前を入力するテキストボックスと、実行ボタンを持つ
- エラーは StatusText に表示する
- 既存のプラグインのヘッダを読んで、実際にあるシグネチャで書くこと
The last sentence is key. Explicitly stating "Read the existing code before writing" significantly reduces the chances of the AI making guesses about API names.

③ The screen that was actually created
The following screen was actually created.
* In the level blueprint, specify RadnodzDemoFromAI as the first screen to display.

When you actually enter a value and press the button, the item name will change.

This time I tried it with Claude Code, but you can create it similarly with other AIs (such as Chat CPT or Gemini).
summary
I started from creating an UE project and went as far as creating a system that allows you to rename REAPER media items with a single button click.
The following three points are important when using the RIGDOCKS API with RADNODZ:
Create a URadnodzClient and connect(ip, port)
All APIs start with AZ_, and the first argument is client.
Success or failure is determined by the Error Code obtained from Get Error.
There are three things to keep in mind on the UE side:
Name the parts and check "Is Variable".
After making changes, compile → save.
After rewriting the C++ code, close the editor and build.
Required Plan
RIGDOCKS -RADNODZ 1.0.0-
RIGDOCKS -BRONZE 3.0.0 and later-
Detailed documentation
The project created this time is available for download below.
LINK
For those who are new to Reaper or considering subscribing to a plan.
See below for the [REAPDOCK]Script documentation.
For a list of APIs used in [APIDOCK]Script, please refer to the following table of contents page.


![[RIGDOCKS: Installation Guide] Trying out the "Trial Version" and "Multi User Licese"](https://static.wixstatic.com/media/daf646_7844133e165046d8b25cb617c920c5c8~mv2.jpg/v1/fill/w_980,h_551,al_c,q_85,usm_0.66_1.00_0.01,enc_avif,quality_auto/daf646_7844133e165046d8b25cb617c920c5c8~mv2.jpg)
