
[Road of SKYSQUARE-033-] Start DIYing your booth!! ~Floor~
- Oct 3, 2025
- 5 min read
Updated: Oct 14, 2025
![[Road of SKYSQUARE-033-] Start DIYing your booth!! ~Floor~](https://static.wixstatic.com/media/fc32ca_1cd35c2774084fb39fdbe95973bcbab7~mv2.jpg/v1/fill/w_980,h_551,al_c,q_85,usm_0.66_1.00_0.01,enc_avif,quality_auto/fc32ca_1cd35c2774084fb39fdbe95973bcbab7~mv2.jpg)
Hello
This is Nakajima from AZSTOKE Co., Ltd.
This is the purpose of this project.
Let's start DIY to create the booth. First, the floor!!
In the previous blog, " [Road of SKYSQUARE-031-] Studio Setup!! ~The Room~ ", electricity was finally brought to the building. With the electricity now available, outlets are now available, which means that it will be possible to install PCs, interfaces, refrigerators, microwaves, etc.
This refers to creating a system that allows you to record without a recorder, which is quite important when recording.
In order to install them, we first need a floor, so we will start the DIY project in order.

Click here for a list of previous SKYSQUARE Road articles

■Table of Contents
1. The ground gets cold, so consider insulation!!
SKYSQUARE is located almost at the top of the mountain, at an amazing height of 1,250m!
That booth is definitely in a cold region in winter, with temperatures reaching -12 degrees. We went winter camping there last winter.
Of course, the tent is equipped with a wood-burning stove.
It was extremely cold outside.
It wasn't a place where snow would pile up several meters deep, but about 30cm piled up, so I felt that we should consider insulating the inside of the booth, and decided to lay insulation on the ground.
This is my first time doing DIY flooring so I don't know what to do, but I'm just going to give it a try.
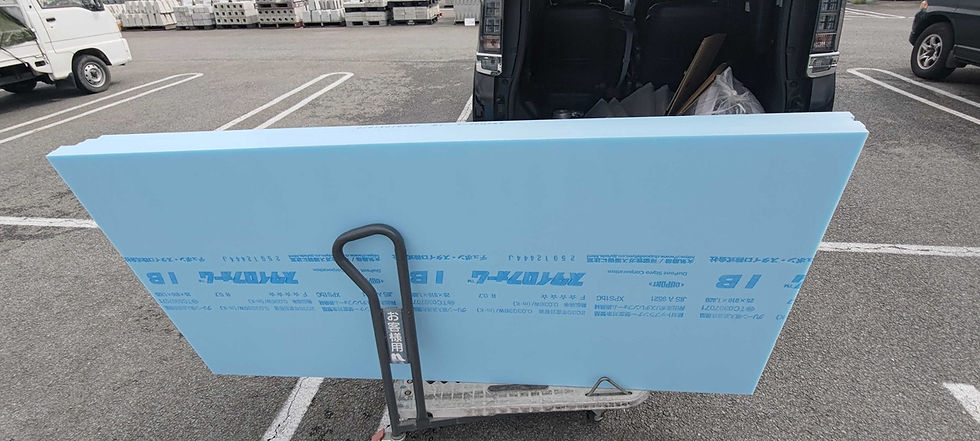
The insulation material used this time is Styrohome.
It is an excellent insulating material that is said to be highly waterproof and will not deteriorate even if submerged in water.
Since it has no sound-absorbing properties, we decided to use this insulation material only for floor insulation.
2. Decide on flooring materials
This time I used a set of three JOINT-LOCK screws, which I purchased from Amazon .
It's an easy renovation that just requires placing it down, and it doesn't require glue or nails, so it can be dealt with if something happens.It's not made of a soft material like a floor mat, but is quite sturdy like a proper board, so I chose it because I thought it would be very strong.

3. First, install insulation
I laid the insulation down with a light-hearted attitude, thinking that it would be fine to just lay it down. Since it can be cut with a cutter, I left it as it was as much as possible and cut it as little as possible to install it.
The insulation is really great. When I walked around in socks in the middle of nowhere in this place, the floor was already very cold, so I thought it would be really bad in the winter, but I felt that the areas with insulation were already able to block out a lot of the cold air from the ground.
This is amazing. I've never actually experienced anything like this before, so I think doing DIY is a valuable experience that allows me to feel this kind of understanding firsthand.


4. The way it's attached may be wrong...
I'm writing this article looking back at the contents here, but I just laid the insulation material out and spread it all over.
I probably didn't understand at the time that if you were renovating a floor, you should first install wood as a base material, then put insulation in between, then lay down plywood, and then start with the flooring material... I hope you'll watch this and think, "I've done it wrong!"
Well, I can always remove it, and if it doesn't work, I'll think about it then, so I'm keeping a positive attitude as I do this DIY project, so even if I fail a lot, I feel like I've succeeded, and I'm regretting it ( ノД`)sob sob...
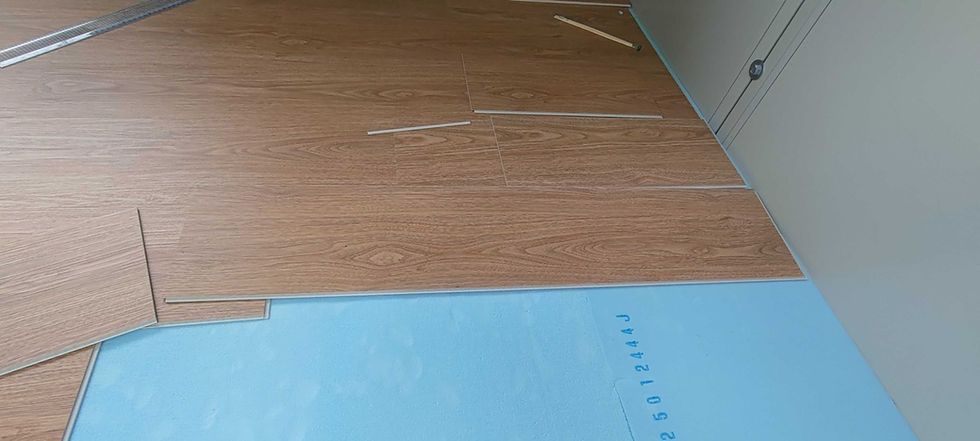
5. Lay the flooring!!!
The flooring is a type that does not require any adhesive and can simply be placed on the floor, so you can keep placing them.
Cut the piece along the way, adjusting the length as you go along the wall.
I put the flooring directly on top of the insulation, and it turned out to be a surprisingly hard floor, probably because I chose a very strong and sturdy material. It may become a problem in the future, but I'll leave it to myself to decide.


6. The floor renovation is complete!
It turned out better than I expected and I'm quite satisfied.
I haven't laid any underlayment or plywood, but for now it's functioning normally as a floor, so I'm happy with it.
Now my dreams can expand - I could put a shelf, a refrigerator, or a microwave here.
I'm also going to start preparing for recording.

![[Road of SKYSQUARE-032-] Infrastructure electricity opened!! ~Electricity~](https://static.wixstatic.com/media/fc32ca_c8a21dadce544d45ac5efbc8cb74a7bd~mv2.jpg/v1/fill/w_980,h_551,al_c,q_85,usm_0.66_1.00_0.01,enc_avif,quality_auto/fc32ca_c8a21dadce544d45ac5efbc8cb74a7bd~mv2.jpg)
![[Road of SKYSQUARE-031-] Studio Setup!! ~The Room~](https://static.wixstatic.com/media/fc32ca_332c03640b444eebac920bda9e05ed16~mv2.jpg/v1/fill/w_980,h_551,al_c,q_85,usm_0.66_1.00_0.01,enc_avif,quality_auto/fc32ca_332c03640b444eebac920bda9e05ed16~mv2.jpg)